


When we gave our html element more functionality so we use selector. In the sense of the selector we target html element like that p, div, h1 etc. or we use class, Id, chained, pseudo class, pseudo element selector etc.
Selectors are many type but here we read only some of those whose are important or we will use more of them for our purpose.
- Note:- All CSS Selector Link
CSS Selector Category:
1st:- Simple Selectors:
- Element/Type Selector
elementname - Id Selector
#idname - Class Selector
.classname - Universal Selector
* ns|* *|* - Grouping Selector
a, b - Attribute Selector
[attrname=value]
2nd:- Combinator Selectors:
- Descendant Selector
a b - Child Selector
a > b - Adjacent Sibling Selector
a + b - General Sibling Selector
a ~ b
3rd:- Pseudo Selectors:
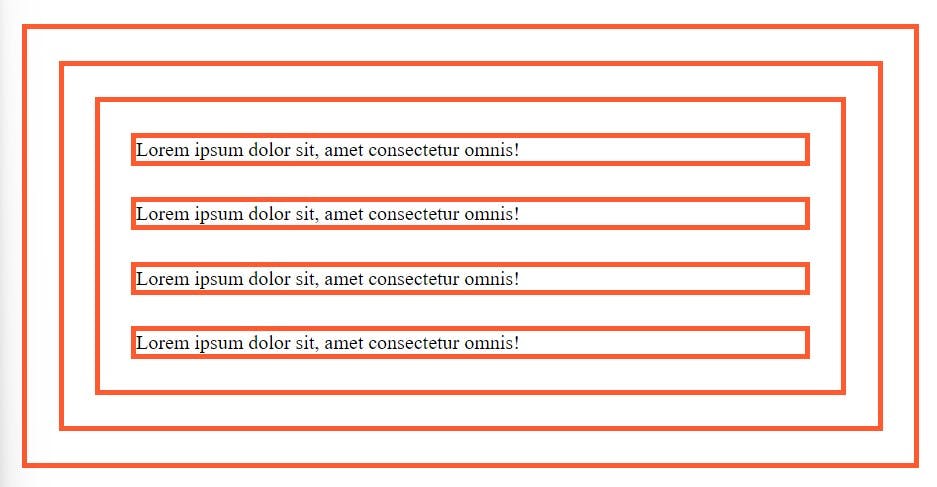
Universal Selector:
- If we want select are html element in our page so we use Universal Selector(*).
Syntax:
*{ style properties }
Example:
<!DOCTYPE html>
<html lang="en">
  <head>
    <meta charset="UTF-8" />
    <meta http-equiv="X-UA-Compatible" content="IE=edge" />
    <meta name="viewport" content="width=device-width, initial-scale=1.0" />
    <title>CSS Universal Selectors</title>

    <style>
      /* style using normal css*/
      /* I am giving here border in  all html elements using other css selector */

      /* p,
      div,
      body,
      html {
        margin: 25px;
        border: 4px solid #ff592f;
      } */

      /* So insted of using p,div,body,html we want use only Astrick(*) css selector. */
      * {
        margin: 25px;
        border: 4px solid #ff592f;
      }
      /*Note:- You can see difference using comment or uncomment one of them selector */
    </style>
  </head>
  <body>
    <!-- Universal Selector -->

    <div>
      <p>Lorem ipsum dolor sit, amet consectetur omnis!</p>
      <p>Lorem ipsum dolor sit, amet consectetur omnis!</p>
      <p>Lorem ipsum dolor sit, amet consectetur omnis!</p>
      <p>Lorem ipsum dolor sit, amet consectetur omnis!</p>
    </div>
  </body>
</html>
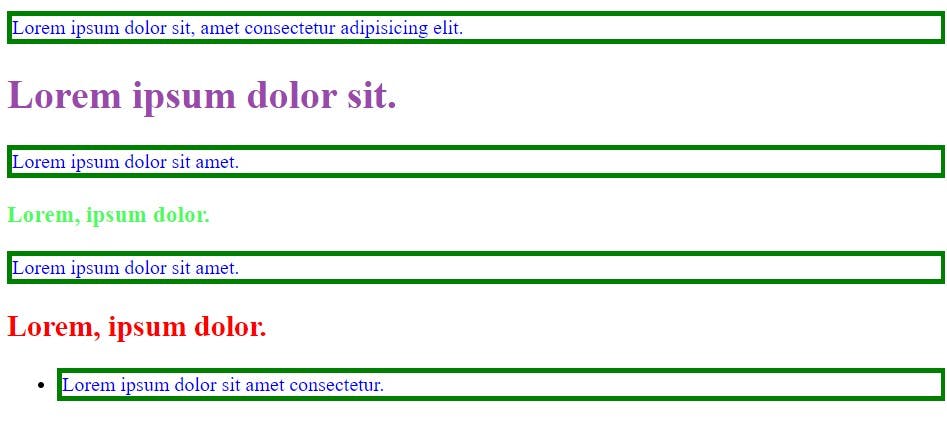
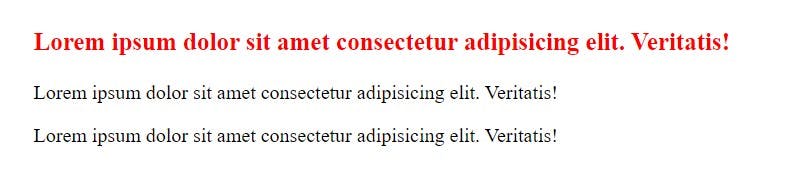
Individual Selector:
Individual selector are select all same element available in page.
Syntax:
element name(p/h1/h2/img/a) { style properties }
Example:
<!DOCTYPE html>
<html lang="en">
  <head>
    <meta charset="UTF-8" />
    <meta http-equiv="X-UA-Compatible" content="IE=edge" />
    <meta name="viewport" content="width=device-width, initial-scale=1.0" />
    <title>Individual Selector</title>
    <style>
      /* Indvidual Selector */
      p {
        border: 4px solid #008000;
        color: blue;
        font-size: 500;
      }

     h1 {
        color: rgb(154, 72, 172);
      }

      h2 {
        color: red;
      }

      h3 {
        color: rgb(76, 251, 96);
      }
    </style>
  </head>
  <body>
    <p>Lorem ipsum dolor sit, amet consectetur adipisicing elit.</p>

    <div>
      <h1>Lorem ipsum dolor sit.</h1>
      <p>Lorem ipsum dolor sit amet.</p>
    </div>

    <h3>Lorem, ipsum dolor.</h3>

    <p>Lorem ipsum dolor sit amet.</p>

    <h2>Lorem, ipsum dolor.</h2>

    <ul>
      <li>
        <p>Lorem ipsum dolor sit amet consectetur.</p>
      </li>
    </ul>
  </body>
</html>
Class & Id Selectors :
When we use Individual selector they select all element in the page, So when we target a special element not all element available in page, we use id or class or both selector.
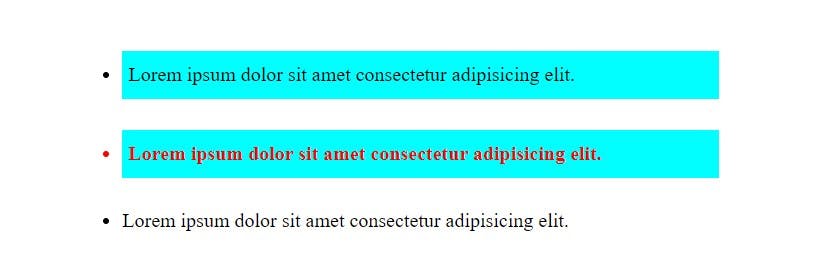
Class Selector:-
When we want targeted a spacefic element then we injected inside tag our class name and provide some additional functionality. When we write class selector name in css we use dot(.) before write class name.
Syntax:
# class name { style properties }
Example:
<!DOCTYPE html>
<html lang="en">
  <head>
    <meta charset="UTF-8" />
    <meta http-equiv="X-UA-Compatible" content="IE=edge" />
    <meta name="viewport" content="width=device-width, initial-scale=1.0" />
    <title>Class & Id Selectors</title>

    <style>
      /* universal selector */
      * {
        margin: 25px;
      }

      /* Class Selector */
      .bgc_color {
        background-color: aqua;
        padding: 10px 5px;
      }

      .text_color {
        color: red;
        font-weight: bold;
      }

      /* Id Selector */

      /* #font_size {
        font-size: 50px;
      }

      #text_color {
        color: brown;
        font-weight: 900;
        font-size: 20px;
      } */
    </style>
  </head>
  <body>
    <div>
      <ul>
        <li class="bgc_color">
          Lorem ipsum dolor sit amet consectetur adipisicing elit.
        </li>
        <li class="bgc_color text_color">
          Lorem ipsum dolor sit amet consectetur adipisicing elit.
        </li>
        <li>Lorem ipsum dolor sit amet consectetur adipisicing elit.</li>
        <!-- <li id="font_size">
          Lorem ipsum dolor sit amet consectetur adipisicing elit.
        </li>
        <li id="text_color">
          Lorem ipsum dolor sit amet consectetur adipisicing elit.
        </li> -->
      </ul>
    </div>
  </body>
</html>
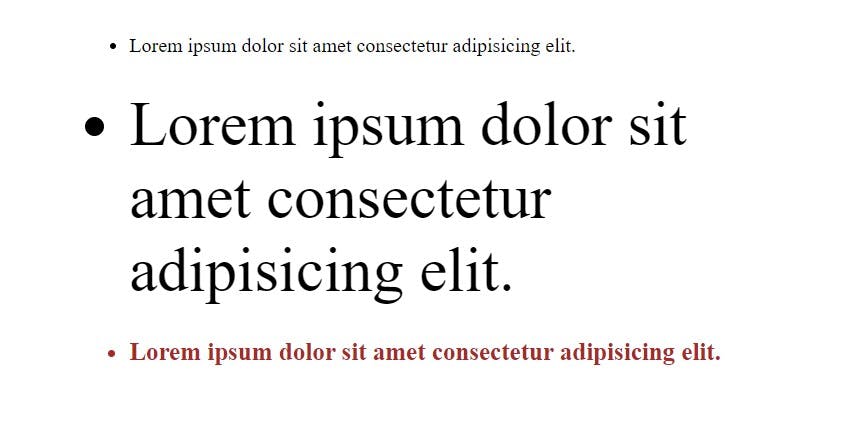
Id Selector:
In html page we use only one id name(same name can not be use) in id selector. When we write id selector name in css we use hashtag(#) before write id name.
Syntax:
# id name { style properties }
Example:
<!DOCTYPE html>
<html lang="en">
  <head>
    <meta charset="UTF-8" />
    <meta http-equiv="X-UA-Compatible" content="IE=edge" />
    <meta name="viewport" content="width=device-width, initial-scale=1.0" />
    <title>Class & Id Selectors</title>

    <style>
      /* universal selector */
      * {
        margin: 25px;
      }

      /* Class Selector */
      /* .bgc_color {
        background-color: aqua;
        padding: 10px 5px;
      }

      .text_color {
        color: red;
        font-weight: bold;
      } */

      /* Id Selector */

      #font_size {
        font-size: 50px;
      }

      #text_color {
        color: brown;
        font-weight: 900;
        font-size: 20px;
      }
    </style>
  </head>
  <body>
    <div>
      <ul>
        <!-- <li class="bgc_color">
          Lorem ipsum dolor sit amet consectetur adipisicing elit.
        </li>
        <li class="bgc_color text_color">
          Lorem ipsum dolor sit amet consectetur adipisicing elit.
        </li> -->

        <li>Lorem ipsum dolor sit amet consectetur adipisicing elit.</li>
        <li id="font_size">
          Lorem ipsum dolor sit amet consectetur adipisicing elit.
        </li>
        <li id="text_color">
          Lorem ipsum dolor sit amet consectetur adipisicing elit.
        </li>
      </ul>
    </div>
  </body>
</html>
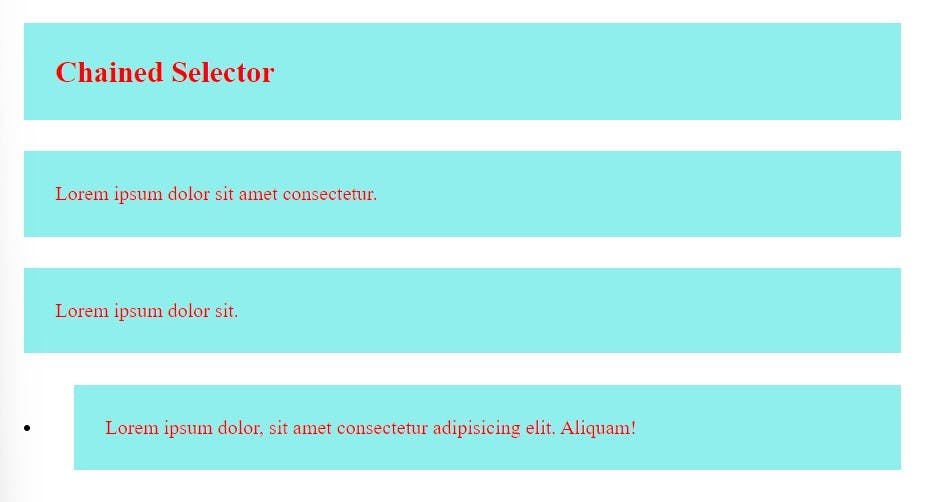
Chained Selector:
Chained selector giving more Specificity, so this is make the hire probability applying the CSS rule those have high specificity , if another selector have lower Specificity, so this selector will not be apply css rule .
Syntax:
.classname.classname#idname { style properties }
Example:
<!DOCTYPE html>
<html lang="en">
  <head>
    <meta charset="UTF-8" />
    <meta http-equiv="X-UA-Compatible" content="IE=edge" />
    <meta name="viewport" content="width=device-width, initial-scale=1.0" />
    <title>Chained Selector</title>

    <style>
      div {
        margin: 50px;
      }

      p.chained.selector#selectors {
        font-weight: 900;
        font-size: 20px;
        color: red;
      }
    </style>
  </head>
  <body>
    <div>
      <p class="chained selector" id="selectors">
        Lorem ipsum dolor sit amet consectetur adipisicing elit. Veritatis!
      </p>
      <p>Lorem ipsum dolor sit amet consectetur adipisicing elit. Veritatis!</p>
      <p class="chained selector">
        Lorem ipsum dolor sit amet consectetur adipisicing elit. Veritatis!
      </p>
    </div>
  </body>
</html>
Combined Selector:
Combined selector means basically we use using comma , and grouping all selector with together. When we gave same css property then we use combined selector.
Syntax:
p, h1, h2, img, div, .warning, #alert { style properties }
Example:
<!DOCTYPE html>
<html lang="en">
  <head>
    <meta charset="UTF-8" />
    <meta http-equiv="X-UA-Compatible" content="IE=edge" />
    <meta name="viewport" content="width=device-width, initial-scale=1.0" />
    <title>Combined Selector</title>

    <style>
      /* combined selector */
      h2,
      .text_color,
      #font_color,
      p {
        margin: 25px;
        padding: 25px;
        color: red;
        background-color: rgb(142, 239, 236);
      }
    </style>
  </head>
  <body>
    <div>
      <h2>Combined Selector</h2>
      <p class="text_color">Lorem ipsum dolor sit amet consectetur.</p>
    </div>

    <p id="font_color">Lorem ipsum dolor sit.</p>

    <ul>
      <li>
        <p>
          Lorem ipsum dolor, sit amet consectetur adipisicing elit. Aliquam!
        </p>
      </li>
    </ul>
  </body>
</html>
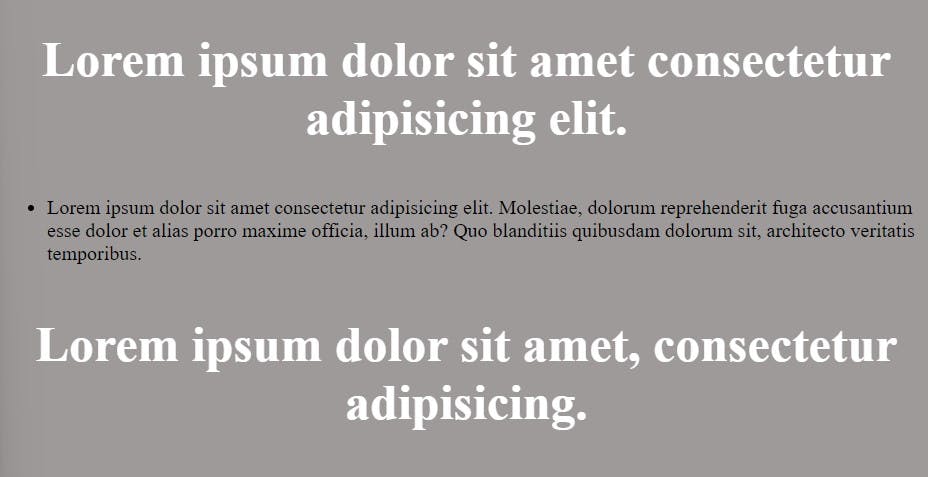
Direct Child Selector:
Direct child selector means parent direct child, If my div container is parent and inside we write paragraph(p) and then write other siblings ul and inside ul write li and inside li we write paragraph(p). So here after div we write paragraph so this will be our direct child not inside's li's paragraph.
Syntax:
parent element name > direct child name { style properties }
Example:
<!DOCTYPE html>
<html lang="en">
  <head>
    <meta charset="UTF-8" />
    <meta http-equiv="X-UA-Compatible" content="IE=edge" />
    <meta name="viewport" content="width=device-width, initial-scale=1.0" />
    <title>Direct Child Selector</title>

    <style>
      body {
        background-color: #9d9a9a;
      }

      /* Direct Child Selector */

      div > p {
        text-align: center;
        color: #fff;
        font-size: 40px;
        font-weight: 800;
      }
    </style>
  </head>
  <body>
    <div>
      <p>Lorem ipsum dolor sit amet consectetur adipisicing elit.</p>

      <ul>
        <li>
          <p>
            Lorem ipsum dolor sit amet consectetur adipisicing elit. Molestiae,
            dolorum reprehenderit fuga accusantium esse dolor et alias porro
            maxime officia, illum ab? Quo blanditiis quibusdam dolorum sit,
            architecto veritatis temporibus.
          </p>
        </li>
      </ul>

      <p>Lorem ipsum dolor sit amet, consectetur adipisicing.</p>
    </div>
  </body>
</html>
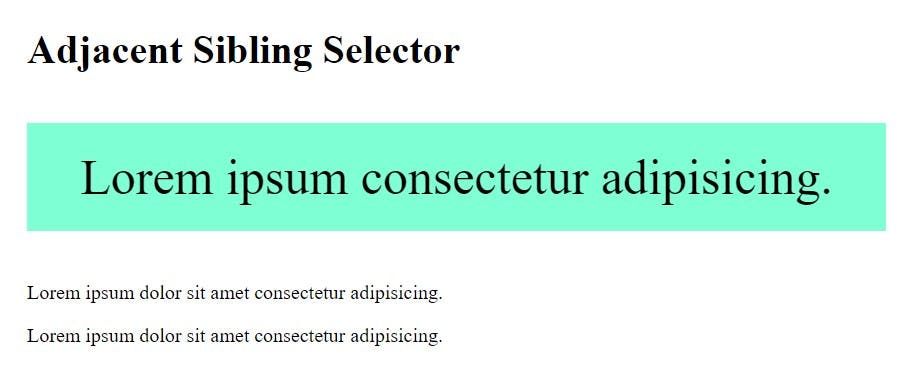
Adjacent Sibling Selector:
Adjacent sibling selector(+) are separates two selectors and select to the only immediately next element, and must both are children of the same parent.
Syntax:
former_element + target_element { style properties }
Example:
<!DOCTYPE html>
<html lang="en">
  <head>
    <meta charset="UTF-8" />
    <meta http-equiv="X-UA-Compatible" content="IE=edge" />
    <meta name="viewport" content="width=device-width, initial-scale=1.0" />
    <title>Sibling Selector</title>

    <style>
      body {
        margin: 40px;
      }

      /* Adjacent Sibling Selector */

      h1 + P {
        text-align: center;
        padding: 20px;
        font-size: 40px;
        background-color: aquamarine;
      }

      /* General Sibling Selector */
      /* h2 ~ p {
        text-decoration: none;
        padding: 10px;
        font-size: 30px;
        background-color: red;
      } */
    </style>
  </head>
  <body>
    <div>
      <h1>Adjacent Sibling Selector</h1>

      <p>Lorem ipsum consectetur adipisicing.</p>

      <p>Lorem ipsum dolor sit amet consectetur adipisicing.</p>

      <p>Lorem ipsum dolor sit amet consectetur adipisicing.</p>

      <!-- <h2>General Sibling Selector</h2>
      <p>Lorem ipsum dolor sit amet consectetur.</p>
      <p>Lorem ipsum dolor sit amet consectetur.</p>
      <p>Lorem ipsum dolor sit amet consectetur.</p>

      <ul>
        <li>
          <p>Lorem ipsum dolor sit amet.</p>
          <p>Lorem ipsum dolor sit amet.</p>
          <p>Lorem ipsum dolor sit amet.</p>
        </li>
      </ul>

      <p>Lorem ipsum dolor sit amet consectetur.</p>
      <p>Lorem ipsum dolor sit amet consectetur.</p> -->
    </div>
  </body>
</html>
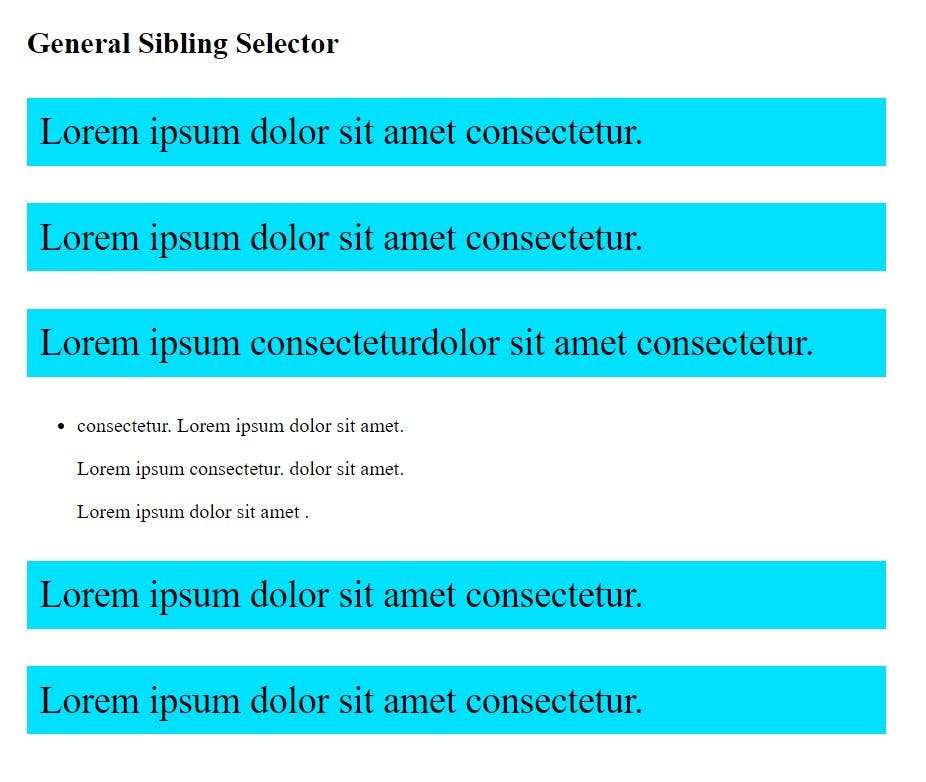
General Sibling Selector:
General sibling selector(~) are separates two selectors, and after former element target to next similar elements are applies on all same css property, when we using general sibling selector, but here is catch the all children element be must only one parent container and not necessarily all element are immediately former element.
Syntax:
former_element ~ target_element { style properties }
Example:
<!DOCTYPE html>
<html lang="en">
  <head>
    <meta charset="UTF-8" />
    <meta http-equiv="X-UA-Compatible" content="IE=edge" />
    <meta name="viewport" content="width=device-width, initial-scale=1.0" />
    <title>Sibling Selector</title>

    <style>
      body {
        margin: 40px;
      }

      /* Adjacent Sibling Selector */

      /* h1 + P {
        text-align: center;
        padding: 20px;
        font-size: 40px;
        background-color: aquamarine;
      } */

      /* General Sibling Selector */
      h2 ~ p {
        text-decoration: none;
        padding: 10px;
        font-size: 30px;
        background-color: rgb(0, 225, 255);
      }
    </style>
  </head>
  <body>
    <div>
      <!-- <h1>Adjacent Sibling Selector</h1>

      <p>Lorem ipsum consectetur adipisicing.</p>

      <p>Lorem ipsum dolor sit amet consectetur adipisicing.</p>

      <p>Lorem ipsum dolor sit amet consectetur adipisicing.</p> -->

      <h2>General Sibling Selector</h2>
      <p>Lorem ipsum dolor sit amet consectetur.</p>
      <p>Lorem ipsum dolor sit amet consectetur.</p>
      <p>Lorem ipsum consecteturdolor sit amet consectetur.</p>

      <ul>
        <li>
          <p>consectetur. Lorem ipsum dolor sit amet.</p>
          <p>Lorem ipsum consectetur. dolor sit amet.</p>
          <p>Lorem ipsum dolor sit amet .</p>
        </li>
      </ul>

      <p>Lorem ipsum dolor sit amet consectetur.</p>
      <p>Lorem ipsum dolor sit amet consectetur.</p>
    </div>
  </body>
</html>
Pseudo Class Selector:
we use this selector giving additional specific property without using class and id selector. Pseudo class have many selector but here we use for example only :hover state before hover use colon(:) and then write pseudo class name.
Syantax:
button:hover {
        box-shadow: inset -10px -20px 4px 2px #f0e8f8;
        background-color: #fff;
        color: #8a2be2;
      }
Example:
<!DOCTYPE html>
<html lang="en">
  <head>
    <meta charset="UTF-8" />
    <meta http-equiv="X-UA-Compatible" content="IE=edge" />
    <meta name="viewport" content="width=device-width, initial-scale=1.0" />
    <title>Pseudo Class Selector</title>

    <style>
      div {
        display: flex;
        align-items: center;
        justify-content: center;
        width: 1000px;
        height: 700px;
        margin: 0 auto;
        background-color: rgb(185, 186, 186);
      }
      button {
        border: none;
        border-radius: 40px;
        outline: none;
        padding: 20px 80px;
        font-size: 20px;
        font-weight: 700;
        color: white;
        text-transform: uppercase;
        background-color: #8a2be2;
        box-shadow: inset -10px -20px 4px 2px #7a21cd;
      }

      /* pseudo class selector */

      button:hover {
        box-shadow: inset -10px -20px 4px 2px #f0e8f8;
        background-color: #fff;
        color: #8a2be2;
      }
    </style>
  </head>
  <body>
    <div>
      <button>submit</button>
    </div>
  </body>
</html>
Normal Button

Using after hover pseudo class effect

Pseudo Element Selector:
Pseudo element selector are also apply some additional specific css on chosen element selector, we use double colon(::) before writing pseudo element selector name.
Here we are using two pseudo element before and after.
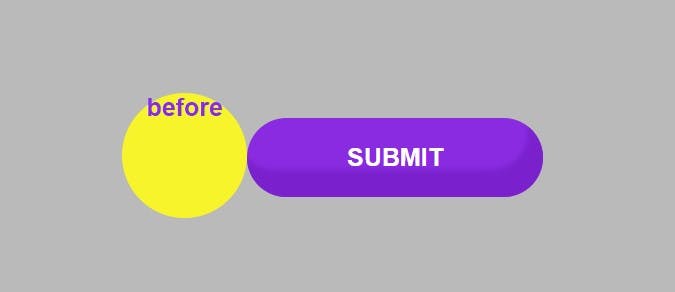
Before Pseudo Selector:
When we want injected new child element before existing element, so then we use ::before pseudo element and one is important things here inside pseudo have must write to content property.
Syntax:
::before
Example:
<!DOCTYPE html>
<html lang="en">
  <head>
    <meta charset="UTF-8" />
    <meta http-equiv="X-UA-Compatible" content="IE=edge" />
    <meta name="viewport" content="width=device-width, initial-scale=1.0" />
    <title>Pseudo Element Selector</title>

    <style>
      div {
        display: flex;
        align-items: center;
        justify-content: center;
        width: 1000px;
        height: 700px;
        margin: 0 auto;
        background-color: rgb(185, 186, 186);
      }
      button {
        border: none;
        border-radius: 40px;
        outline: none;
        padding: 20px 80px;
        font-size: 20px;
        font-weight: 700;
        color: white;
        text-transform: uppercase;
        background-color: #8a2be2;
        box-shadow: inset -10px -20px 4px 2px #7a21cd;
      }

      /* before pseudo element selector */

      button::before {
        content: "before";
        width: 100px;
        height: 100px;
        background-color: rgb(248, 244, 43);
        position: absolute;
        transform: translate(-180%, -40%);
        border-radius: 50%;

        text-transform: lowercase;
        color: #8a2be2;
      }
    </style>
  </head>
  <body>
    <div><button>submit</button></div>
  </body>
</html>
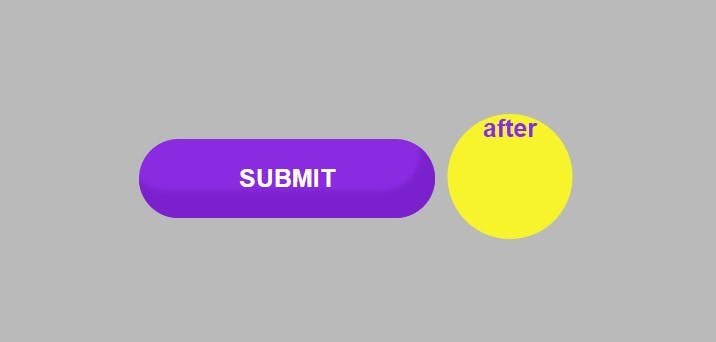
Before Pseudo Selector:
When we want injected new child element before existing element, so then we use ::before pseudo element and one is important things here inside pseudo have must write to content property.
Syntax:
::after
Example:
<!DOCTYPE html>
<html lang="en">
  <head>
    <meta charset="UTF-8" />
    <meta http-equiv="X-UA-Compatible" content="IE=edge" />
    <meta name="viewport" content="width=device-width, initial-scale=1.0" />
    <title>Pseudo Element Selector</title>

    <style>
      div {
        display: flex;
        align-items: center;
        justify-content: center;
        width: 1000px;
        height: 700px;
        margin: 0 auto;
        background-color: rgb(185, 186, 186);
      }
      button {
        border: none;
        border-radius: 40px;
        outline: none;
        padding: 20px 80px;
        font-size: 20px;
        font-weight: 700;
        color: white;
        text-transform: uppercase;
        background-color: #8a2be2;
        box-shadow: inset -10px -20px 4px 2px #7a21cd;
      }

      /* before pseudo element selector */

      /* button::before {
        content: "before";
        width: 100px;
        height: 100px;
        background-color: rgb(248, 244, 43);
        position: absolute;
        transform: translate(-180%, -40%);
        border-radius: 50%;

        text-transform: lowercase;
        color: #8a2be2;
      }*/

      /* after pseudo element selector */

      button::after {
        content: "after";
        width: 100px;
        height: 100px;
        background-color: rgb(248, 244, 43);
        position: absolute;
        transform: translate(90%, -40%);
        border-radius: 50%;
        text-transform: lowercase;
        color: #8a2be2;
      }
    </style>
  </head>
  <body>
    <div><button>submit</button></div>
  </body>
</html>
Thanks for reading our blog, please gives your valuable suggestion.
Ok, Bye and we will meet you in the next blog.